Showing posts with label Setup. Show all posts

Wednesday, January 25, 2012

Sea Salt Macro Pix Revisited


Since I wasn’t completely happy with macro photos of the sae salt I took last week I’ve decided to give it another try. I think it worked out a little bit better. I have placed the salt in clear glass dish that was sitting on top of Plexiglas box and then I put halogen flood light directly underneath. Still, not what I wanted so I placed flash to the front and side and set it at 1/128th power so it will not overpower the bottom light. Much better, but not there yet. Next, I have placed 67mm 80A blue Kenko filter I have from SLR days underneath the glass dish so that halogen light will pass through before hitting the salt. That did it. Next option was to try flashing some colorful backgrounds placed under the salt to see what will happen. I used same card as in my “Oil on Water” shot, colorful golf balls, and it turned out OK. I have tried another card with red flowers and it was different. I don’t know how far I can go with this project but it surely was fun.

Himalayan Mountain salt with halogen light moved to side.
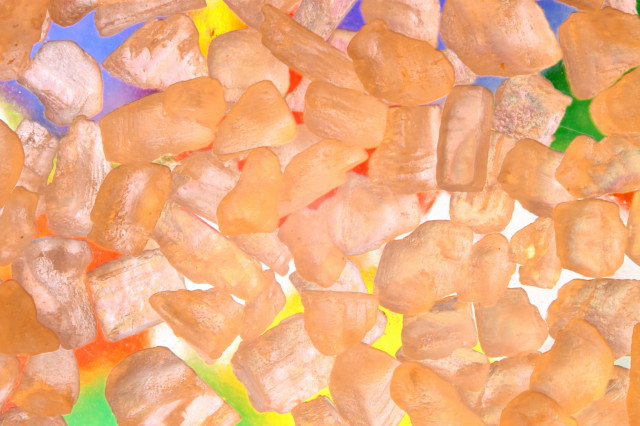
One flash lighting the card at full power and second flash from front and right at 1/128th power. Sea Salt.

Red flower card underneath.

Setup for picture #1 and #2.

Blue filter under the salt.

Wednesday, January 18, 2012

Oil on Water Abstract Images Set-Up


As promised here is simple way to take some amazing abstract pictures of oil droplets on water. All you need is a glass dish with clear bottom, some sort of glass table if you will be using small dish like I did, some colorful picture or paper for background and spot light or table lamp (with mini fluorescent or halogen bulb), small bowl for oil and eye dropper. Since the focusing is so critical good tripod is a must and focusing rail is big help but not necessary. The tripod, background and eye dropper are the most important items for this shoot. I used birthday card with images of different color golf balls and tees and also book cover from “Color mixing bible”. Both have bold and clear colors. When you start shooting it is good idea to pre-focus the lens and get everything ready. Use the depth-of-field button on your camera to make sure that the background is out of focus. Since I was using 50mm macro lens in 1:1 ratio with very shallow depth-of-field even at f/11 it is not a problem. If the background is too sharp even at lowest f-stop you have to increase distance between water surface and background picture. All is left to do now is to play around with exposure and start dropping tiny drops of oil. If the droplets combine, break them up with sharp needle or toothpick just like stirring coffee with a spoon. When you do that and look through viewfinder you will see amazing scene.

I shaded the lamp with silver Mylar to protect lens from stray light and to reflect more light on background. It is the background that lights up the picture. Notice the small dish for water.
Camera is mounted to focusing rail.
Background for pictures #1 and #5.
 Background for pictures #2, 3 and 4.

I took a movie of breaking the oil drops and it looks like some Sci-Fi flick.

Tuesday, January 17, 2012

Strawberry Drop Set-Up


Foundation of my set-up for this shot was my home made light tent frame. I build it from CPVC 1/2” water tubing and several elbows and “T” fittings and use it for almost all of my indoor close-up shots.
For this particular shot two things are very critical: focus and target. In order to have the main subject as sharp as possible I had to construct sort of scaffolding where I could clamp target that was about the same size as strawberry and as close to location in water as possible.


To do that I have tied steel nut to a string and then lowered it into wine glass. When focusing was done I have raised the nut to a location about 5” above the surface of water. This gave me precise spot from where I would drop the strawberry. It must be dropped from exact same spot every time. I dropped the strawberry from directly underneath the nut, it actually came in the contact with the nut.

In order for strawberry to stand out you will need strong but filtered backlight. I used Vivitar 285 flash triggered by radio and I was strobing through prismatic Plexiglas and diffuser screen. I didn’t try it but I think that you can use white bed sheet and strong spot light or table lamp for the back light. It is worth to experiment with.

The black strips on side of wine glass were created with 2 pieces of black cardboard placed at angle behind and to the side of the glass. You just have to move it around for your desired effect.
The main flash was placed to one side of camera and about half way between lens and glass. Since it was so close I filtered the flash with a sheet of toilet tissue. Again. The flash was triggered with radio.
Now that everything is set-up all you have to do is keep dropping! One more thing: don’t forget to clean the wine glass after every drop. Unwanted droplet of water on front or sides of the glass will ruin your perfectly timed shot. I am speaking from experience, been there, done that.
It can be very tedious but rewarding shoot. I ended up with 1 good shot for every 20 drops. Thanks heaven for digital photography!